Disclaimer: Wizard skins are to be used only for special programs and University of Illinois System skins. If you are a part of the University of Illinois Urbana-Champaign or the UIC campus, click here to learn how to make a skin using the Illinois Web Theme.
Creating a Wizard Skin to use for your emails in Email+ is fast and straightforward. The steps outlined below pertain to Email Wizard skins, but the process for creating an Ecard Wizard skin or an Application Wizard skin is largely the same, though some of the individual design options are different.

DeleteEdit embedded media in the Files Tab and re-insert as needed.
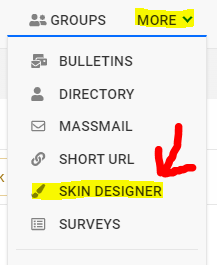
To begin, hover over the MORE tab and select SKIN DESIGNER from the drop down menu.
The skin will open onto the General Tab. Here, you can give your skin a name. The Name in Email+ is what you will see when you go to apply your skin to your email. The Name in Skin Designer is what you will see in your list of skins in the Skin Designer.
*NOTE: Click Save often!
From there, click on the Skin tab. Once in the Basic Design Settings, you can start formatting your skin!
The first thing to do is to add your Header. It is important to remember that your Header image will determine the width of your email body. The recommended image width is 800px. Anything above 900px will not look good on phones, and anything below 700px is narrow and will look unappealing on a desktop.
Click Delete Image to remove the default image, then upload your header image. You can change the Alt text and give your header image a URL link.
Now, you have two choices for your Skin's Footer. First, I will describe how to add footer social media and footer information manually.
1. Once you have added your Header image, you can add your program's Social Media. Select the network from the drop down, add the link, then click Add. Only include one link per social media type (don't use two Facebooks or two Instagrams).
Then, at the bottom under the Footer section, you can add your program's address, phone number, any important links, etc.
2. Another way of inserting a footer for your program is to add an image file. An important thing to consider is that your image should be the same width as your header image. Anything smaller will not function properly, and anything larger will break the content area of your skin.
To do this, scroll to the bottom of the Footer block and click to Choose a file and Upload an image.
After clicking Save, you have now completed the majority of your skin. The only things left to do are to grant Access and Privileges so people can use your skin.
Click the Access tab. Here, you can select any Groups you want to be able to use your skin. Also, you can choose departments or units. DO NOT select anything for campus. The whole university does not want/need access to your skin.
Next, under the Privileges tab, if only a few people need Administrator access to your skin, you can insert their NetIDs to grant them full access!
Once you've clicked Save, you have successfully created your Wizard skin! Congratulations!